Upgrade Guide: CampaignFlow | Predictive Response
Upgrade Guide: CampaignFlow
- Overview
- Install CampaignFlow
- Install InstantSend
- Trigger Action Field
- Active CampaignFlows
- We can help!
Overview
The CampaignFlow (CFL) application has been upgraded to allow you to setup rules that will:
- Utilize date fields and Salesforce date literals to trigger the addition of leads and/or contacts to a campaign.
- Trigger flows based on formula and date fields using the Schedule option.
- Populate your campaign using the new Run Now feature.
Install Campaign Flow
To start the install process:
- Use the provided link
- Click Continue
- Click Next
- Verify desired security access and click Next
- On the next screen, select Grant access to admins only, and click Next
- On the final screen, click Install.
![]() Important: It is best to grant access to your system admin(s) first and then modify the profiles that are assigned to the users that will be using the application.
Important: It is best to grant access to your system admin(s) first and then modify the profiles that are assigned to the users that will be using the application.
Install InstantSend
![]() Stop: If you are not using Campaign Flow with the Adaptive Mailer, skip this step.
Stop: If you are not using Campaign Flow with the Adaptive Mailer, skip this step.
- Use the provided link
- Log into Salesforce (if prompted)
- Enter the password provided in the email and click Submit
- Click Continue
- On the popup window – Approve Third-Part Access, click Yes… and Continue
- Click Next
- On the next screen, select Grant access to all users, and click Next
- Click Install
Trigger Action Field
This field is required when using CFL with the Adaptive Mailer. The value has to be added to the picklist field.
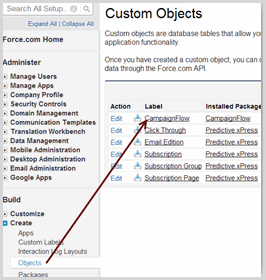
- Go to Setup
- Locate and expand Create
- Select Objects
- Click on the Campaign Flow Label
- Scroll down to the Custom Fields & Relationships section and locate the Trigger Action field
- Click on Trigger Action and then New in the Picklist Values section
- Add InstantSend for Predictive
Active CampaignFlows
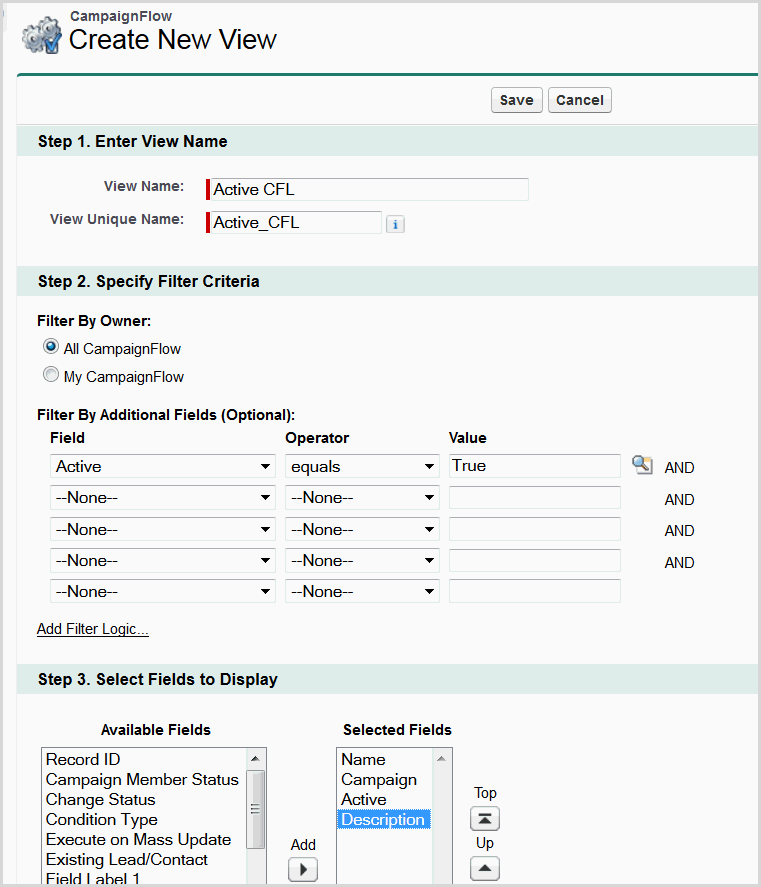
Because we have moved from an InstantSend check box to a picklist value, all active flows have to be modified so that they continue working as planned. The easiest way to manage this process is to:
- Click on the plus (+) sign in the Salesforce Interface
- Locate the CampaignFlow menu item
- Create a view as shown below
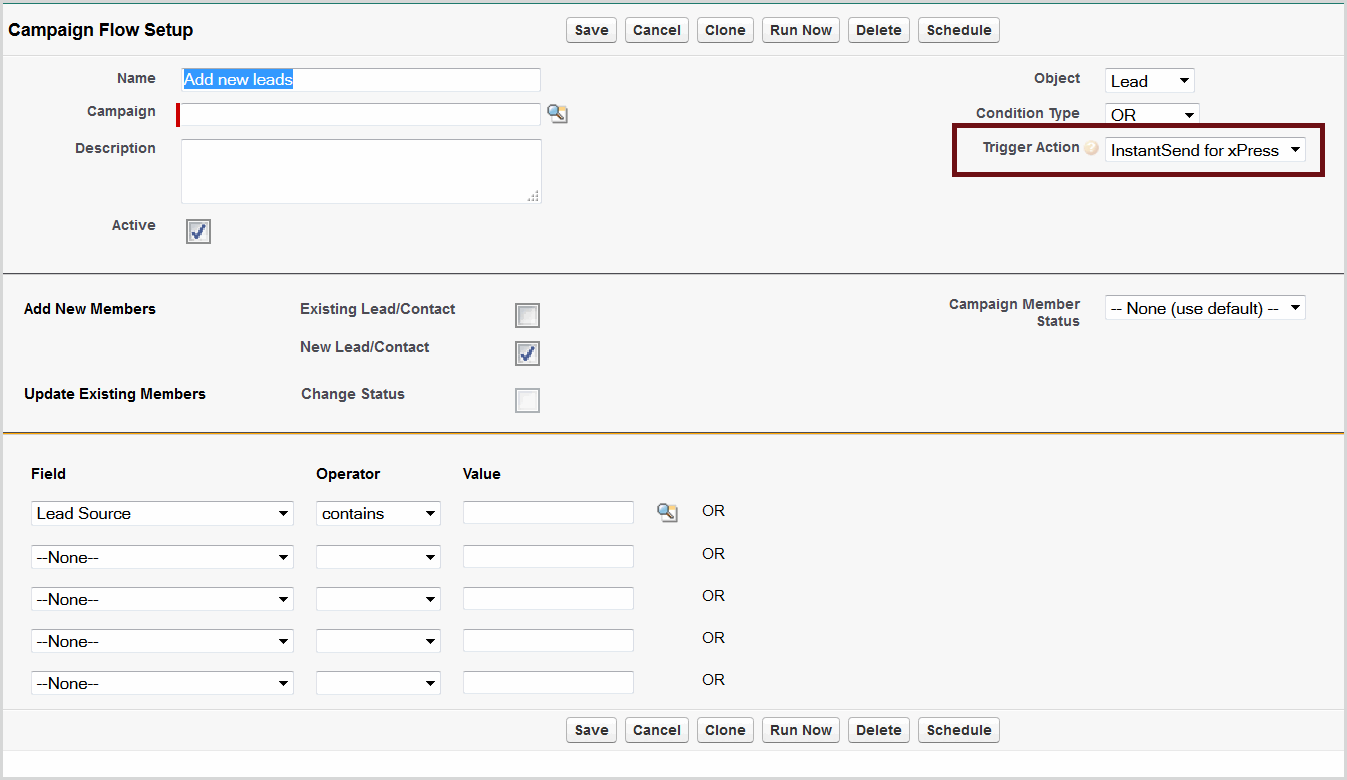
- Open each active flow from the view and select InstantSend for xPress from the Trigger Action drop down.
We can help!
For assistance with the installation/configuration of a Predictive application or to request a training session, please use the link below:
https://help.predictiveresponse.com/support-session
Back to Top
 (0)
(0) (0)
(0)


