Create a Campaign in Lightning | Predictive Response
Create a Campaign in Lightning
A campaign is where you begin the email marketing process. The campaign houses the marketing emails you will send, as well as the contacts and/or leads you will send them to. You can have multiple campaigns, tailored to the marketing type. You can have campaigns for newsletters, donations, appeals, summits, and many more.
Checklist: Create a Campaign
This checklist is used when you are creating a Predictive email campaign.
![]() Step 1. Confirm global test members are added and add additional test members as needed. This information is provided in the Campaign Members section on your campaign page.
Step 1. Confirm global test members are added and add additional test members as needed. This information is provided in the Campaign Members section on your campaign page.
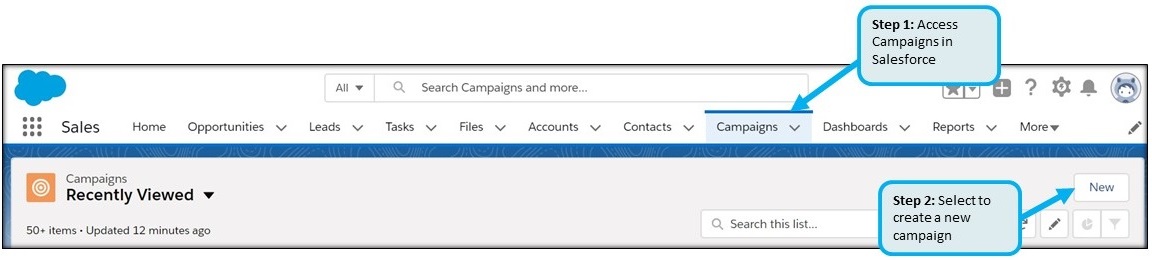
![]() Step 2. Create the campaign in Salesforce. Complete the required fields and select a supported campaign type.
Step 2. Create the campaign in Salesforce. Complete the required fields and select a supported campaign type.
![]() Step 3. Add Campaign Members. Use a lead/contact view, report, or our separate CampaignFlow application.
Step 3. Add Campaign Members. Use a lead/contact view, report, or our separate CampaignFlow application.
![]() Step 4. Create the Email Edition. Use our eMaker editor to create your email and design template.
Step 4. Create the Email Edition. Use our eMaker editor to create your email and design template.
Important: The order in which you complete steps 3 and 4 can be changed. It is important to remember that anytime you add leads/contacts to the campaign AFTER the first edition is started, you must do a synchronization to add the new members from Salesforce to the Predictive database.
![]() Step 5. Test the email. Send a test email to yourself and/or your global test member group.
Step 5. Test the email. Send a test email to yourself and/or your global test member group.
![]() Step 6. Send the email. You have the option to send the email right away or let the schedule settings manage the process.
Step 6. Send the email. You have the option to send the email right away or let the schedule settings manage the process.
Step 1: Add Global Test Member(s)
Create a global test member for your campaign to review the content and links of all email editions. This is important to ensure that the email content is consistent, contains no typos, and that any links open to the correct web page and are tracked by Predictive as desired.
You can add additional test members as needed, for more information visit the following link.
Watch the video below to learn how to create a global test member:
Step 2: Create the campaign
![]() Please turn off any browser ad-blockers during this process as they can interfere with page and popups loading successfully.
Please turn off any browser ad-blockers during this process as they can interfere with page and popups loading successfully.
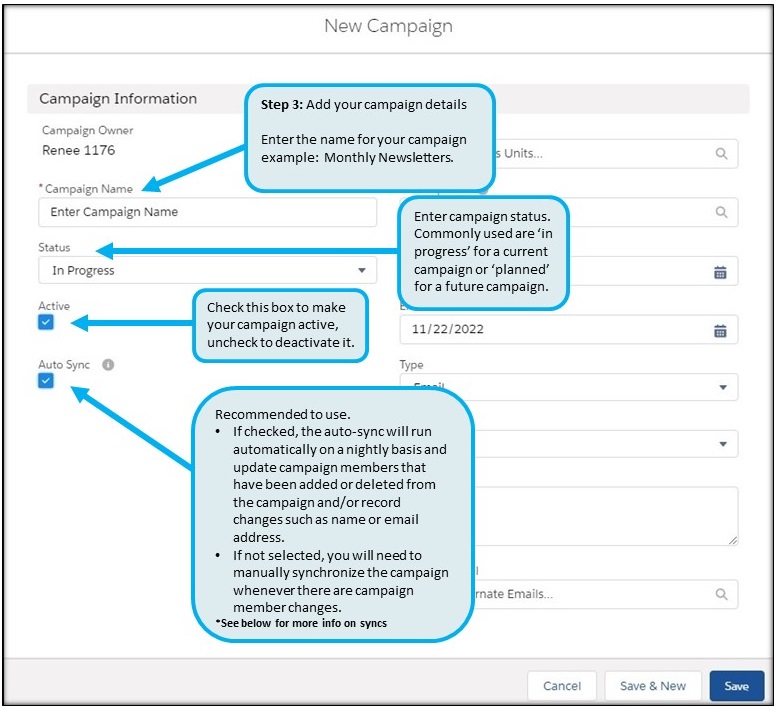
For more information on syncs visit the following link.
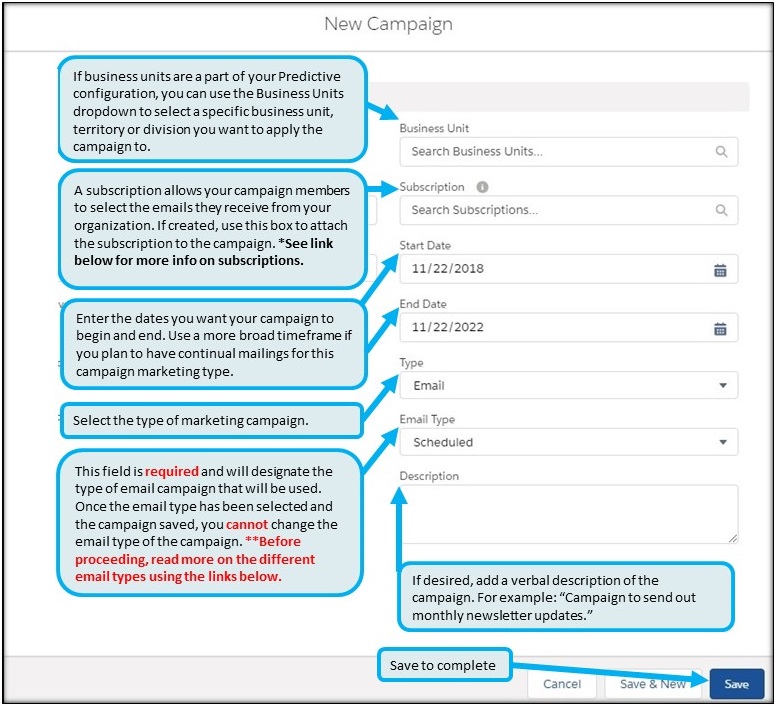
For more information on subscriptions visit the following link.
For more information on email types visit the following links: scheduled, drip, adaptive.
Step 3: Add Campaign Members
Campaign members are added to a campaign through their lead or contact records in Salesforce.
There are several options to add contacts and leads to a campaign. Click here for instructions.
Step 4: Create Your Email Edition
Now you are ready to create your email edition. The system will auto-create the initial one once you have initiated the first campaign synchronization, completed in the last step.
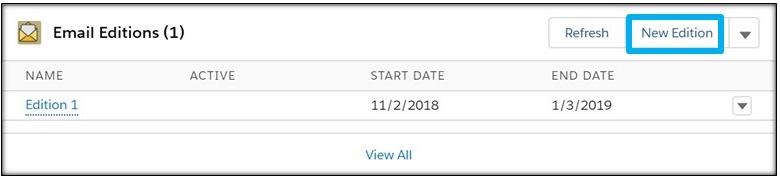
- A campaign can have multiple email editions and you should create a new email edition each time you want to send a new mailing (you cannot re-send an email edition).
- To create additional email editions you can click on the ‘New Edition’ button in the email edition section of the campaign. If the new edition doesn’t appear right away, try refreshing your browser page.
To set up your email, access the eMaker editor from the edition within your campaign.
- For information on creating your email edition, visit our BeeEditor help guide
- For information on designing your email edition, visit our Designer help guide
Step 5: Test Your Email Edition
The test process is important to ensure your campaign emails give the correct message and provide the right impression about your organization.
Test members should:
- Review the content: They should ensure that the message is correct and that there are no errors in grammar, etc.
- Click the links: If you have added links to your content, all links should be clicked to not only confirm they open to the right page but that the clicks are tracked.
- Review any merge fields to ensure they are populating the correct information.
In Step 2 you created a global test member. Now you will send a test email to that member. Once completed, check your inbox to review the email.
To initiate a test to your global test member, click on the test step and select test to group.
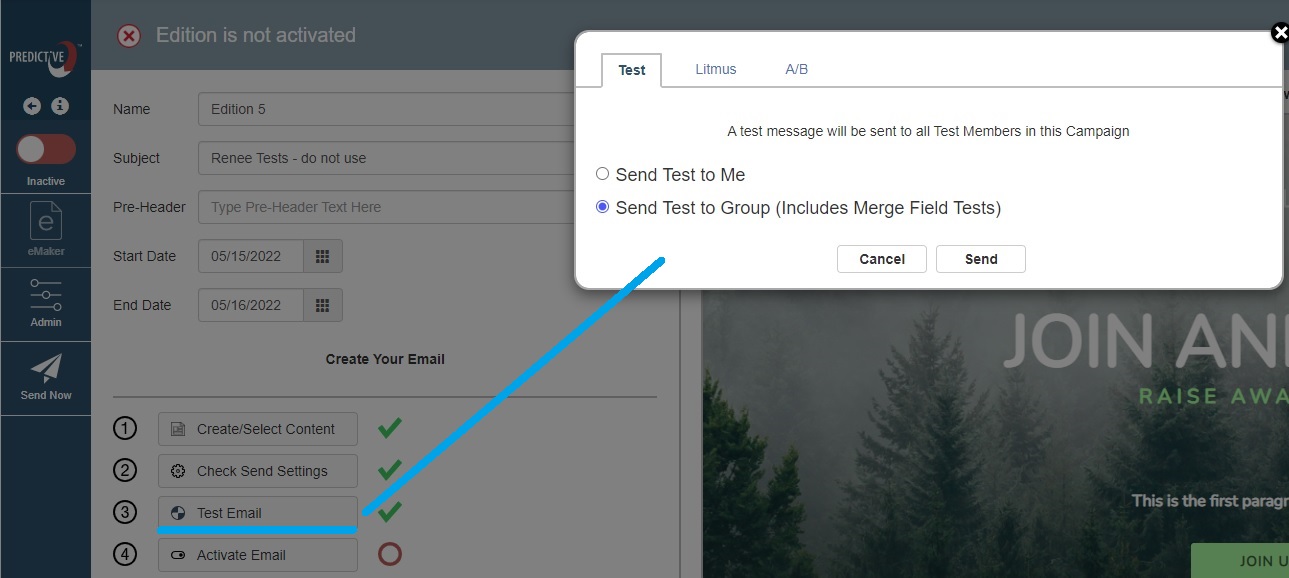
![]() You can also select the ‘test to me’ option, however this will only test the visual appearance of the email, and not the functionality (merge fields and link tracking).
You can also select the ‘test to me’ option, however this will only test the visual appearance of the email, and not the functionality (merge fields and link tracking).
Predictive offers enhanced testing features such as email previews on various email clients (called Insight), Spam Analysis, and A/B testing. For more information visit the following link.
Step 6: Check Send Settings & Activate Your Email
You have the option to let the schedule settings manage the email send or initiate it right away. Follow this link to review your send setting options: https://help.predictiveresponse.com/?page_id=7621
Activate your edition:
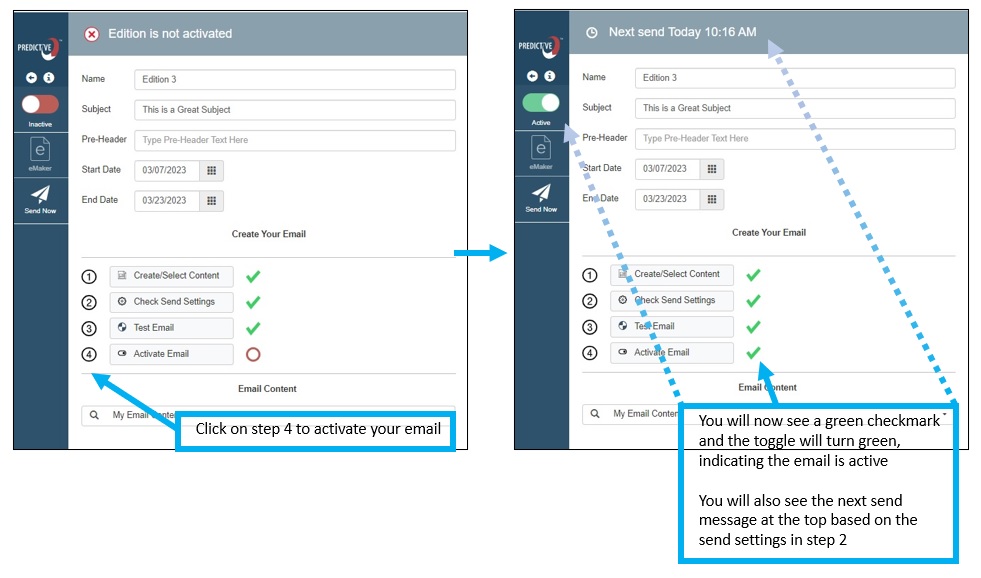
The email will send during the next scheduled send time. Or you can click the send now icon to send the email immediately: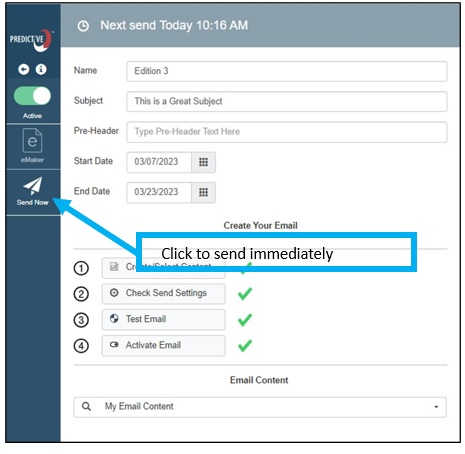

 (2)
(2) (0)
(0)