Create a Campaign | Predictive Response
Create a Campaign
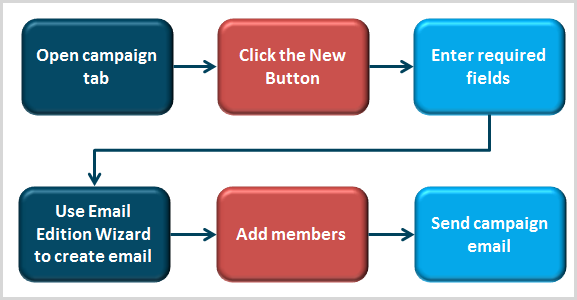
Use our Campaign Checklist or follow these steps to create your campaign in Salesforce Classic:
Instructions in Lightning can be found here.
- Create a new campaign
- Use the Email Edition Wizard to create, test and send your email
- Add members to the campaign
Back to Top
Create a new campaign
Open the Campaign Tab in Salesforce and click the New button.
![]() Important: The fields noted below are required when using the Adaptive Mailer for campaign management.
Important: The fields noted below are required when using the Adaptive Mailer for campaign management.
- Campaign Name
- Active
- Email Type: The types supported by the Adaptive Mailer are:
![]() Adaptive: This type will send follow-up emails (automatically) depending on the action each member takes. Click here for more information.
Adaptive: This type will send follow-up emails (automatically) depending on the action each member takes. Click here for more information.
![]() Scheduled: Each email is created with a valid date range and will only be sent within that range. Click here for more information.
Scheduled: Each email is created with a valid date range and will only be sent within that range. Click here for more information.
![]() Drip: This type will send each email to the members after the defined number of days. It can also be used for a one-off email blast. Click here for more information.
Drip: This type will send each email to the members after the defined number of days. It can also be used for a one-off email blast. Click here for more information.
-
-
- Campaign start and end dates – these dates will control how long your campaign is active and therefore how long emails can be sent from the campaign. Be sure to allow enough time for all emails to be sent.
- Campaign start and end dates – these dates will control how long your campaign is active and therefore how long emails can be sent from the campaign. Be sure to allow enough time for all emails to be sent.
-
![]() Important: The Active check box is required to activate your campaign and send emails. The box can be checked when you create the campaign or right before you wish to start sending your emails.
Important: The Active check box is required to activate your campaign and send emails. The box can be checked when you create the campaign or right before you wish to start sending your emails.
![]() Reference: Additional options are available for the campaign in the Predictive section on your campaign page, click here for more information.
Reference: Additional options are available for the campaign in the Predictive section on your campaign page, click here for more information.
![]() Important: Contact your Salesforce administrator if one or more of the following occur:
Important: Contact your Salesforce administrator if one or more of the following occur:
-
-
-
-
-
- You do not see the New button from the Campaign tab view
- You do not see the Predictive supported campaign types in the drop down list
- You can only see your active campaigns from the Campaign tab
-
-
-
-
Back to Top
 (0)
(0) (0)
(0)