Configure and Use Dynamic Content | Predictive Response
Configure and Use Dynamic Content
To use Dynamic Content, an option needs to be enabled by the Predictive Support team. Please use our online support ticket to request the option – Support Ticket.
Configuration
The first step in using dynamic content is to make sure that the field being used as the trigger for the dynamic content is mapped. If the field is already mapped, it has to be connected to dynamic content and this is done by clicking Save. Go to;
- Predictive Admin tab
- Merge Field icon
- Add your field, if not already listed
- Click the Save button (required even if field already listed)
After the new option is enabled, you will have a new Related List. This needs to be added to the appropriate campaign page layouts. Go to:
- Setup
- Build
- Expand Customize
- Expand Campaigns
- Click on Page Layouts
- Click to edit the appropriate layout
- From the layout grid, locate the menu item for Related Lists
- Locate the item named Dynamic Content and drag to the desired location on your page
- Use the wrench icon to add your desired fields*
- Click Save when done
- Repeat steps 6 through 10 for other page layouts
*Suggested fields
- Label
- Description
- Lead | Contact Field
- Token
Prior to setting your content, confirm that you have your fields in place on the lead or contact pages. Follow your standard process for adding custom fields as needed.
Field Setup
![]() Note: Each campaign can have a different set of dynamic content.
Note: Each campaign can have a different set of dynamic content.
Follow these steps to create the information for your campaign.
- Locate the Dynamic Content related list after creating your campaign
- Click the New Dynamic Content button

- Complete the fields
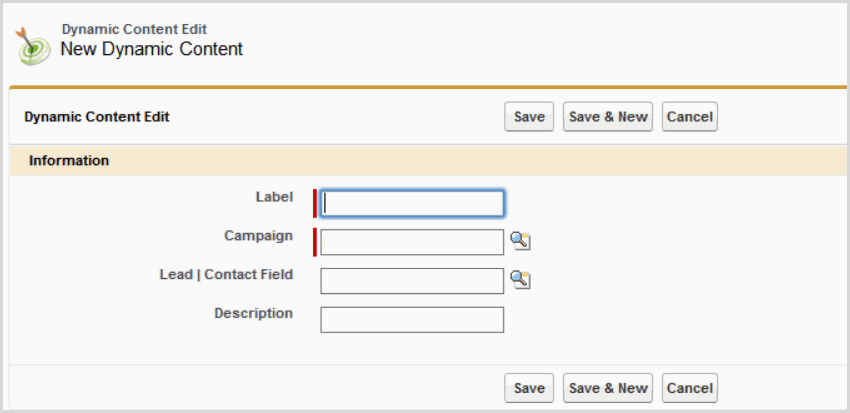
| Field Name | Description |
| Label | Enter a unique identifier |
| Campaign | This field auto-fills with the campaign name you are working on |
| Lead | Contact Field | Use the look-up function to locate the appropriate field. |
| Description | Internal (Optional) |
![]() Information: For details on mapping lead/contact fields click here.
Information: For details on mapping lead/contact fields click here.
- After saving the initial information, you will see a content window.

- Click the New Content button
- Complete the fields
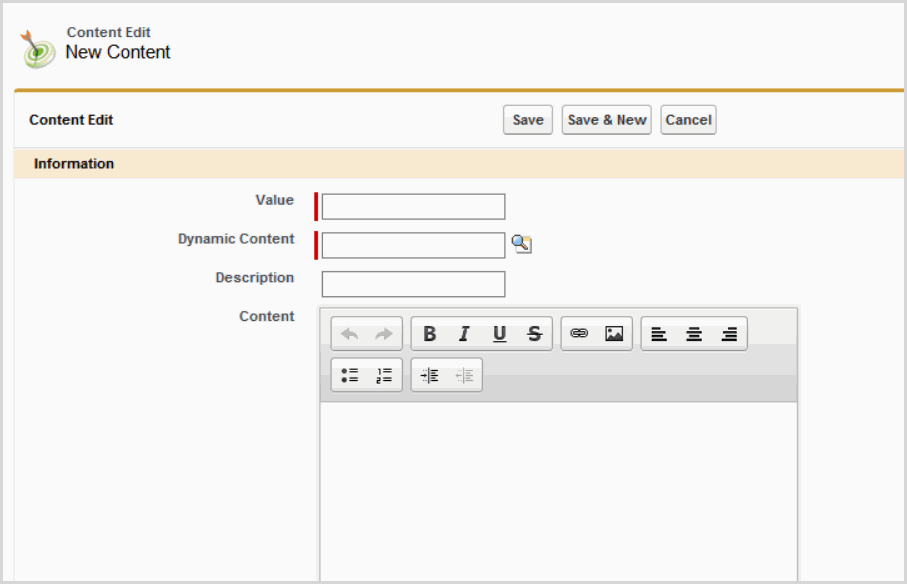
| Field Name | Description |
| Value | Enter a unique identifier |
| Dynamic Content | This field auto-fills with the name you added in the first section, or you can use the look-up function as needed |
| Description | Internal (Optional) |
| Content | Add your desired content in this area. Use the available formatting options as desired. |
- When done, use the Save or Save & New button.
![]() Note: Once saved, you will have access to a Clone button which allows you to create a new copy of your entry and make the desired changes.
Note: Once saved, you will have access to a Clone button which allows you to create a new copy of your entry and make the desired changes.
Example
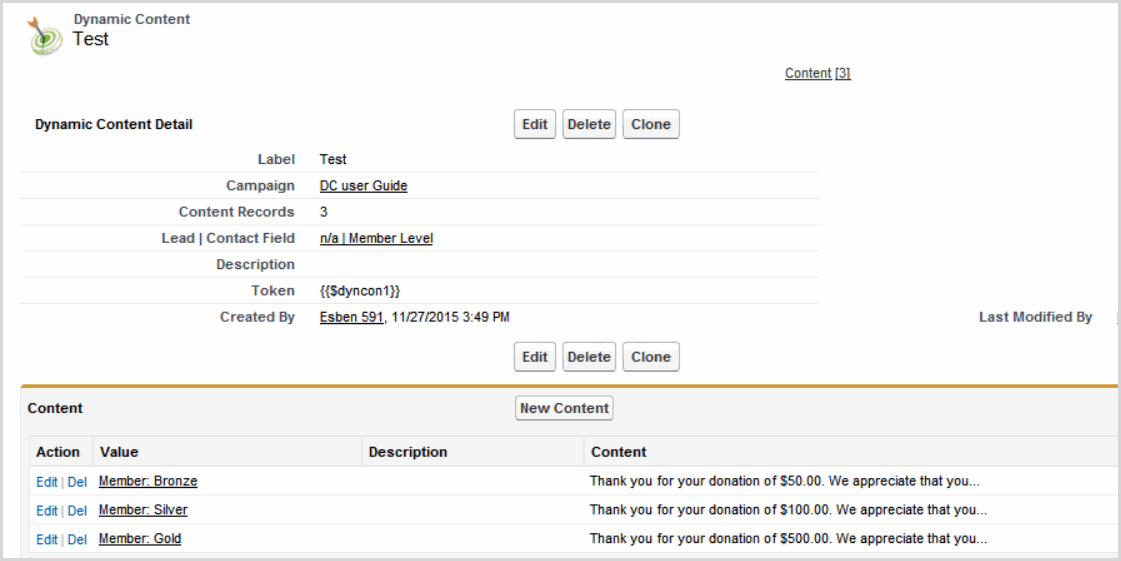
- Click the Publish button when done
- A popup message will display indicating that your dynamic content sync is in progress.
Using
Create your campaign and then create the email. Use the token that was created when you configured the dynamic content.

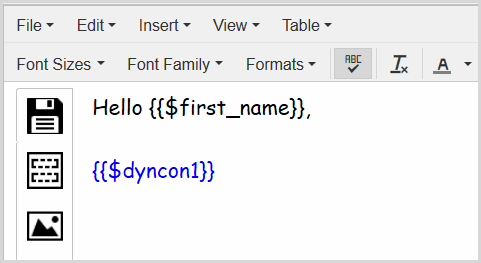
Then the normal process of testing and sending the email edition is followed.
Contact Level is updated
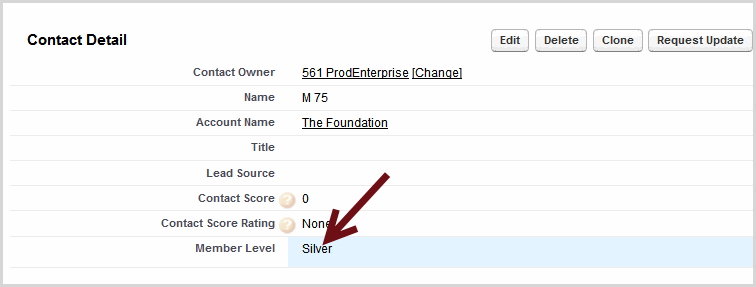
Contact is added to the campaign and sent the email
Back to Top
 (0)
(0) (0)
(0)
