Subscription Management | Predictive Response
Subscription Management
Predictive provides the ability to create a subscription management page. The benefits of using this type of access for your campaign members are:
- Allows your campaign members the ability to select and de-select the messages they wish to receive. This reduces the possibility of a global opt out and keeps your leads and contacts engaged with you longer.
- Reduces time spent by users in your organization when they create and run reports to add lead and contacts to a campaign.
![]() Reference: Click here to see page examples.
Reference: Click here to see page examples.
How to view subscription information
Our custom campaign page layout includes a field called Subscriptions. This field will auto-fill if you add the campaign during the subscription page process, or can be completed when you want the campaign to be part of a subscription page.
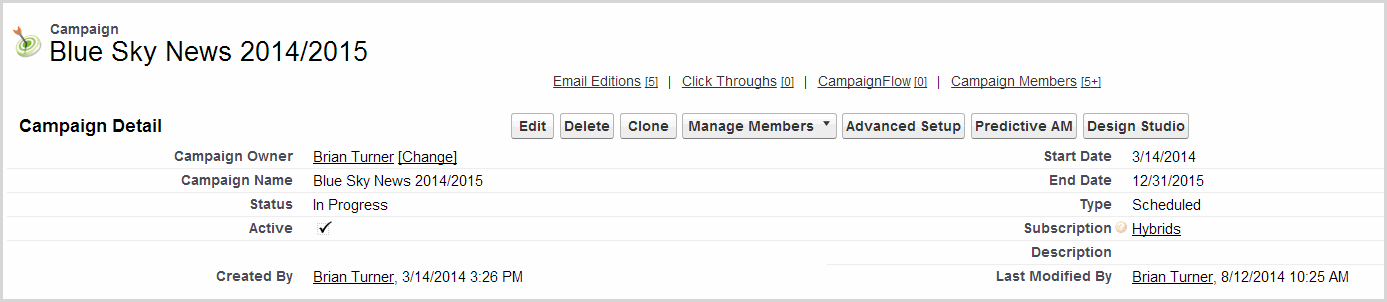
This field can be added to your campaign page layout if you are not using the one provided with the Predictive AM installation.
Our custom lead/contact page layouts includes the following:
- Subscriptions Button: Click this button to view the last version of the page completed by either the lead/contact or one of your users

- Subscriber Choices Section: This section will display the subscriptions selected or de-selected and their current status for each listed subscription.

![]() Information: If a lead/contact is added to campaign associated with a subscription, that information will not display in the Subscriber Choices section.
Information: If a lead/contact is added to campaign associated with a subscription, that information will not display in the Subscriber Choices section.
How to create and publish a subscription page
- Step 1: Create a placeholder on your website
- Step 2: Create the subscription page
- Step 3: Create one or more subscription groups
- Step 4: Create one or more subscriptions
- Step 5: Create or add campaigns to each subscription
- Step 6: Publish your page
- Additional Info: Customizing your subscription page
Step 1: Create a placeholder on your website
Predictive provides a generic subscription page – use this url if you wish: https://aws.predictiveresponse.net/subscriptions.
Or you can add the subscription to your website. Click on the appropriate link below and use the code to create provided on your web page.
Back to Top
Step 2: Create the subscription page
After clicking the New button on the Subscription page in Salesforce, complete these fields:
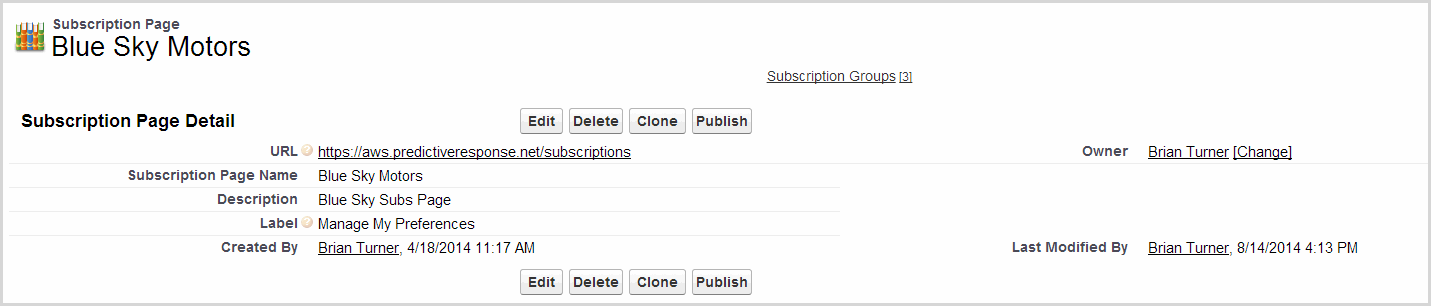
- URL: The url for the web page placeholder on your site
- Subscription Page Name: Internal identifier
- Description: Optional, Internal
- Label: This will display as the page heading on the page and in the footer of all emails from associated campaigns
Back to Top
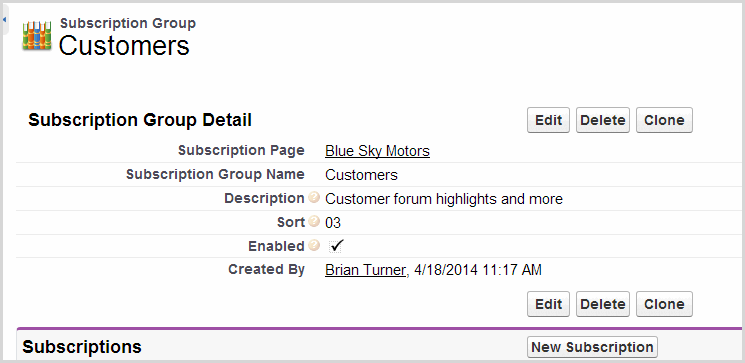
Step 3: Create one or more subscription groups
Click the New Subscription Group button and
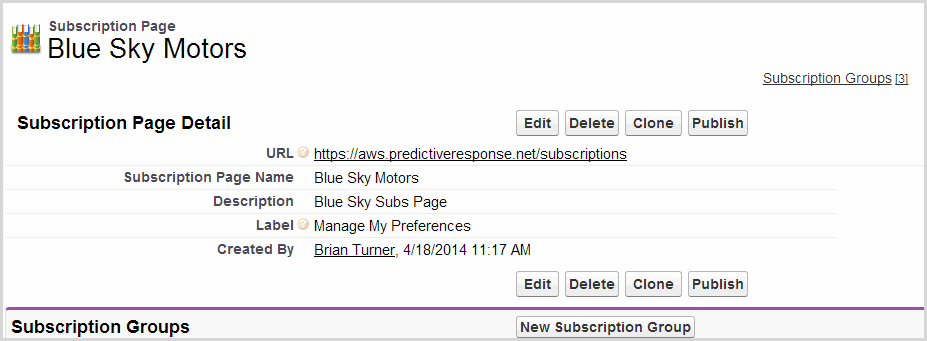
Complete these fields:
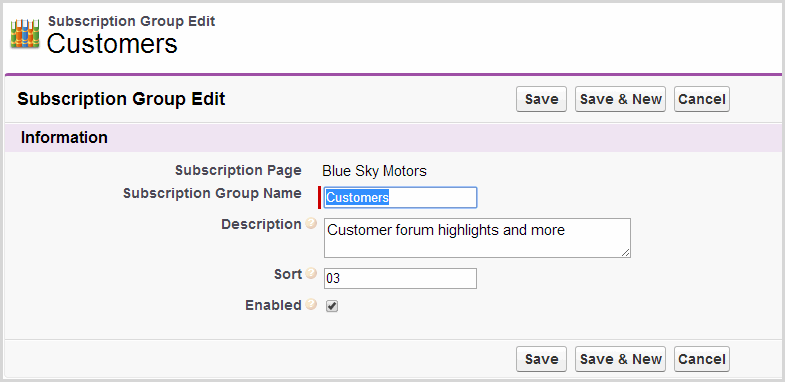
- Subscription Group Name: This will display on the subscription page
- Description: This will display on the subscription page
- Sort: Use this field to set up how the list will appear on the page
- Enabled: Check/Un-Check as desired
Back to Top
Step 4: Create one or more subscriptions
Click the New Subscription button and
Complete these fields:
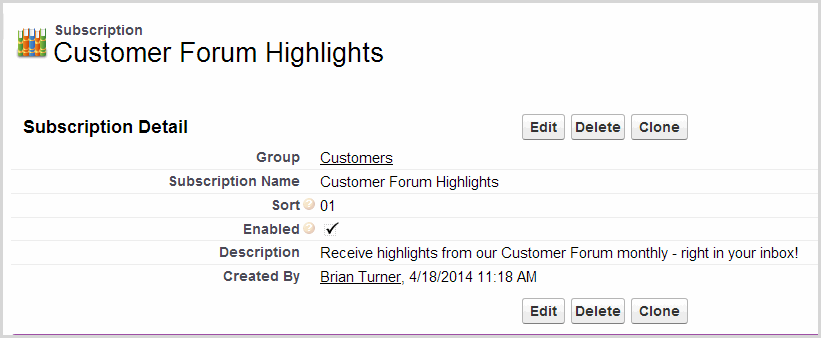
- Subscription Name: This will display on the subscription page
- Sort: Use this field to set up how the list will appear on the page
- Enabled: Check/Un-Check as desired
- Description: This will display on the subscription page
Step 5: Create or add campaigns to each subscription
Click the New Campaign Button here and create a new campaign, or locate an existing campaign and complete the subscription field to link it to the page
![]() Reference: Click here for more information on creating campaigns.
Reference: Click here for more information on creating campaigns.
Step 6: Publish your page
Go back to the main Subscription page in Salesforce and click the Publish button. This process will display a generic version of your page and pushes the information to the web page designated in Step 1.
Back to Top
Customizing your subscription page
Use the following information to modify the look and feel of your page so that it matches the other pages on your web site.
Global Settings
| Setting | Description |
|---|---|
| ‘id’: “frmahotpr”, | Page holder ID – Enter your page id here so that you can access it at a later time. This value cannot contain any spaces or underscores. These examples are invalid: ‘id’: “frma hotpr” ‘id’: “frma_hotpr” |
| ‘width’: “98%”, | This defines the width of your web page content. You can define the width by using a percentage or number of pixels. Examples: ‘width’: “50%” means that your content will utilize 50% of the available space ‘width’: “500px” means that your content will utilize 500 pixels of width |
| height’: “600px”, | This defines the height of your web page content in pixels – any number of pixels can be used. |
| ‘style’: “border:1px solid #CCCCCC;”, | This defines the border element. Learn More |
| ‘background_color’: ‘#FFFFFF’, | This defines the background color – the Predictive default is set as white. |
Text Content Styles
This table indicates the different styles used in the subscription management page.
| Style | Description |
|---|---|
| Heading 1 (h1) | { “font_family”:”Arial, Helvetica, sans-serif”, “color”:”#000000″, “font_size”:”18px”} |
| Heading 2 (h2) | { “font_family”:”Arial, Helvetica, sans-serif”, “color”:”#000000″, “font_size”:”18px”} |
| Heading 3 (h3) | { “font_family”:’Arial, Helvetica, sans-serif’, “color”:”#000000″, “font_size”:”14px”} |
| Heading 4 (h4) | { “font_family”:’Arial, Helvetica, sans-serif’, “color”:”#000000″, “font_size”:”12px”} |
| subtitle | { “font_family”:’Arial, Helvetica, sans-serif’, “color”:”#000000″, “font_size”:”12px”} |
| info_text | {“font_family”:’Arial, Helvetica, sans-serif’, “color”:”#000000″, “font_size”:”12px”} |
Page Content
The subscription names and descriptions were created in Salesforce as noted earlier in this module. The remaining text (content) on your page can be modified to meet your needs. These sections of text that can be modified.
- title
- subtitle
- email_title
- title_contact_list
- title_contact-list_subtitle
- button_sumbit_title
Back to Top
Example
This is what your page will look like when you click the Publish button:
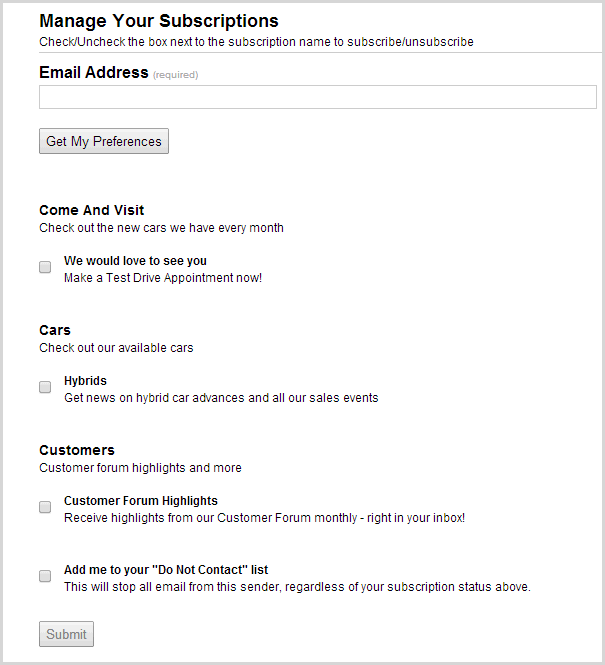
When this displays from the link in a campaign email, the page shown above will display with your web page frame around it.
Back to Top
 (0)
(0) (0)
(0)