ZFusion: Install and Connect | Predictive Response
ZFusion: Install and Connect
Requirements: In order to install and connect the ZFusion app, you will need:
- A Zoom user account with Zoom Webinar permissions
- A Salesforce user account with System Administrator Permissions
You should be logged into both of the above accounts during the install/connect process.
Setup Steps:
![]() Step 1. Installing the ZFusion Salesforce app from Salesforce AppExchange.
Step 1. Installing the ZFusion Salesforce app from Salesforce AppExchange.
![]() Step 2. Installing the ZFusion Zoom app from the Zoom Marketplace
Step 2. Installing the ZFusion Zoom app from the Zoom Marketplace
![]() Step 3. Connecting your Zoom account to Salesforce
Step 3. Connecting your Zoom account to Salesforce
![]() Step 4. Configuring ZFusion Settings
Step 4. Configuring ZFusion Settings
![]() Step 5. Configuring ZFusion Page Layouts
Step 5. Configuring ZFusion Page Layouts
Installing and Connecting the ZFusion App
Step 1. Installing the ZFusion Salesforce app from Salesforce AppExchange.
- Log into your Salesforce environment and navigate to the AppExchange. Note that you must have a Salesforce Administrator profile or permission to install apps.
- Find the ZFusion Salesforce app and install it into your Salesforce org. You may choose to install for Admins only or for all users, depending on your team’s needs. A single ZFusion license allows all users in your org to access ZFusion objects, so there is no cost associated with broadening access to the app.
Step 2. Installing the ZFusion Zoom app from the Zoom Marketplace
- Log into your Zoom account. Note that you must have Webinar permissions in Zoom to use this app.
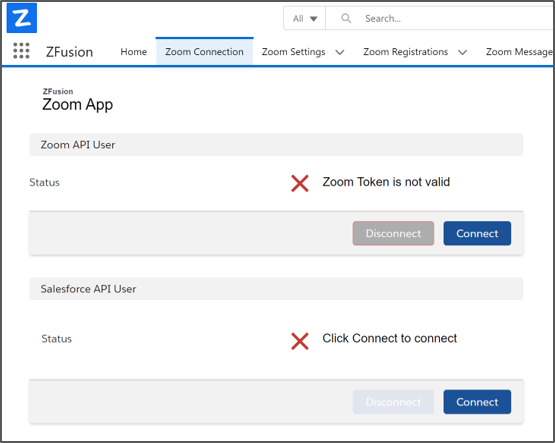
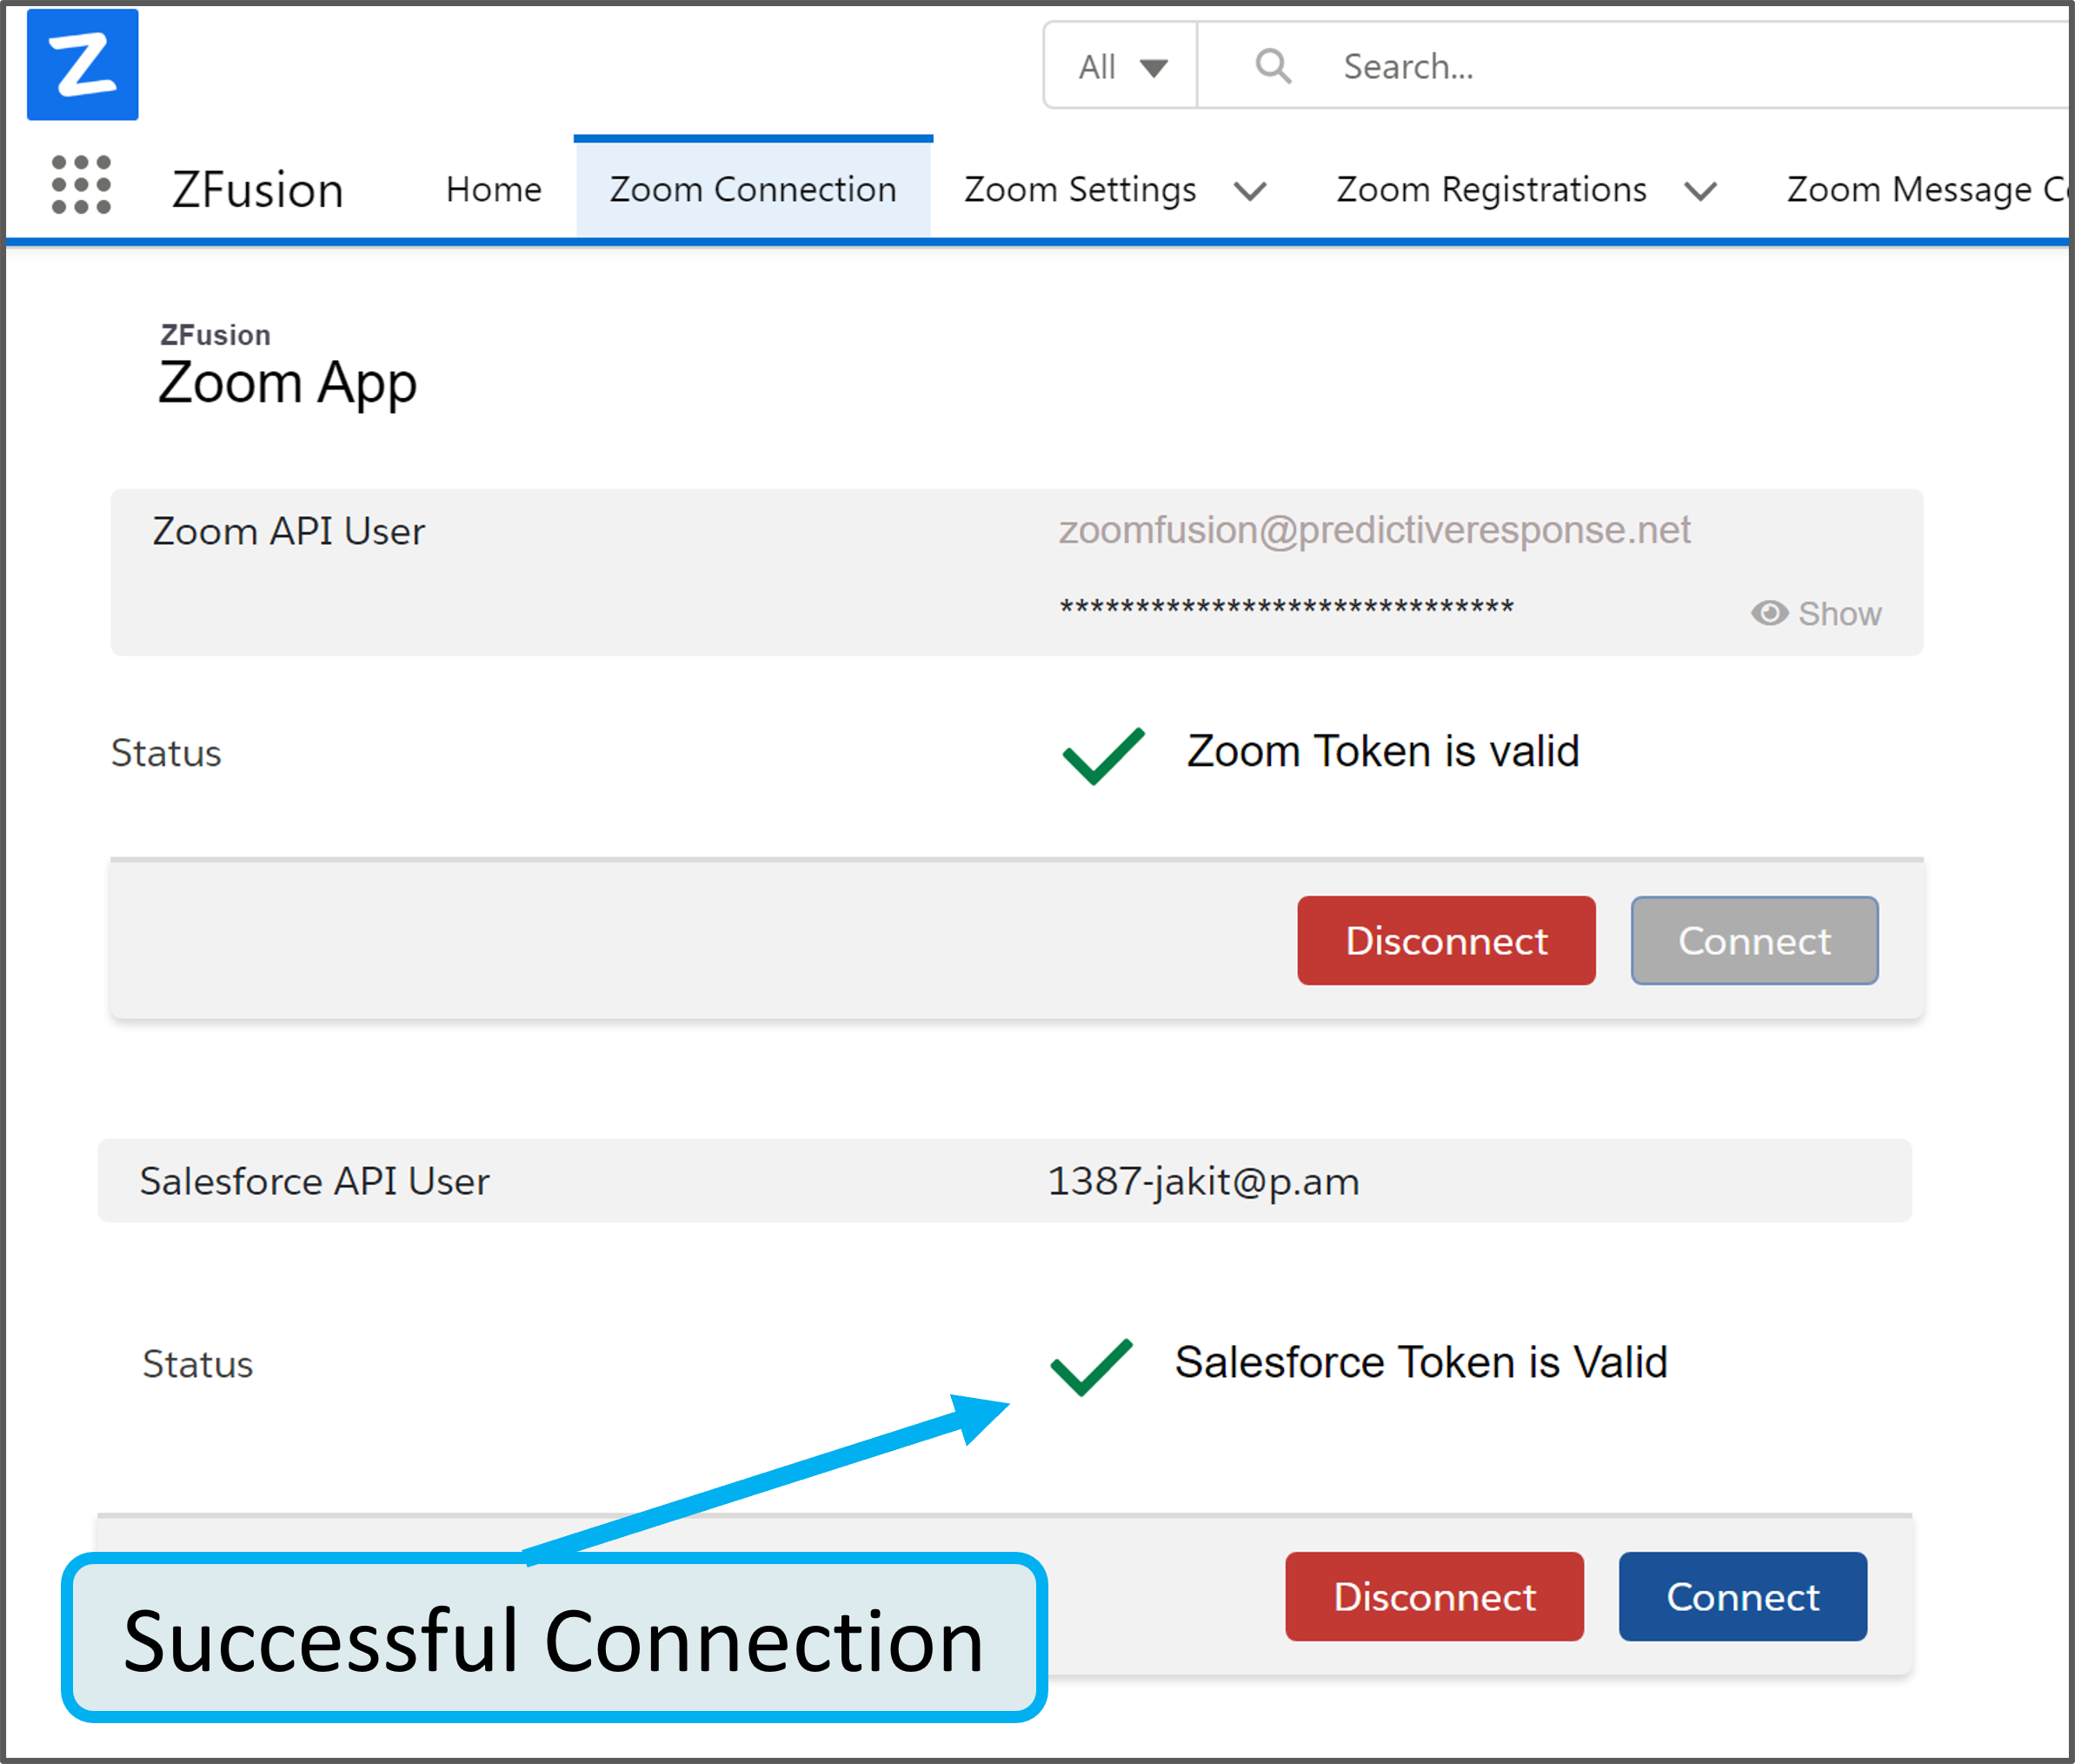
Step 3. Connecting your Zoom account to Salesforce
- Log into your Zoom account. The logged in user should have Webinar permissions in Zoom.
- While still logged into your Zoom account, navigate to the Zoom Connection tab in Salesforce and click “Connect” under the Zoom API section
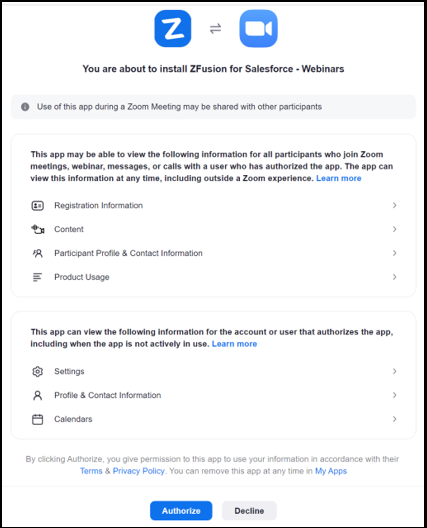
- On the screen that appears, click the “Authorize” button to allow Zoom to send your webinar data to Salesforce.
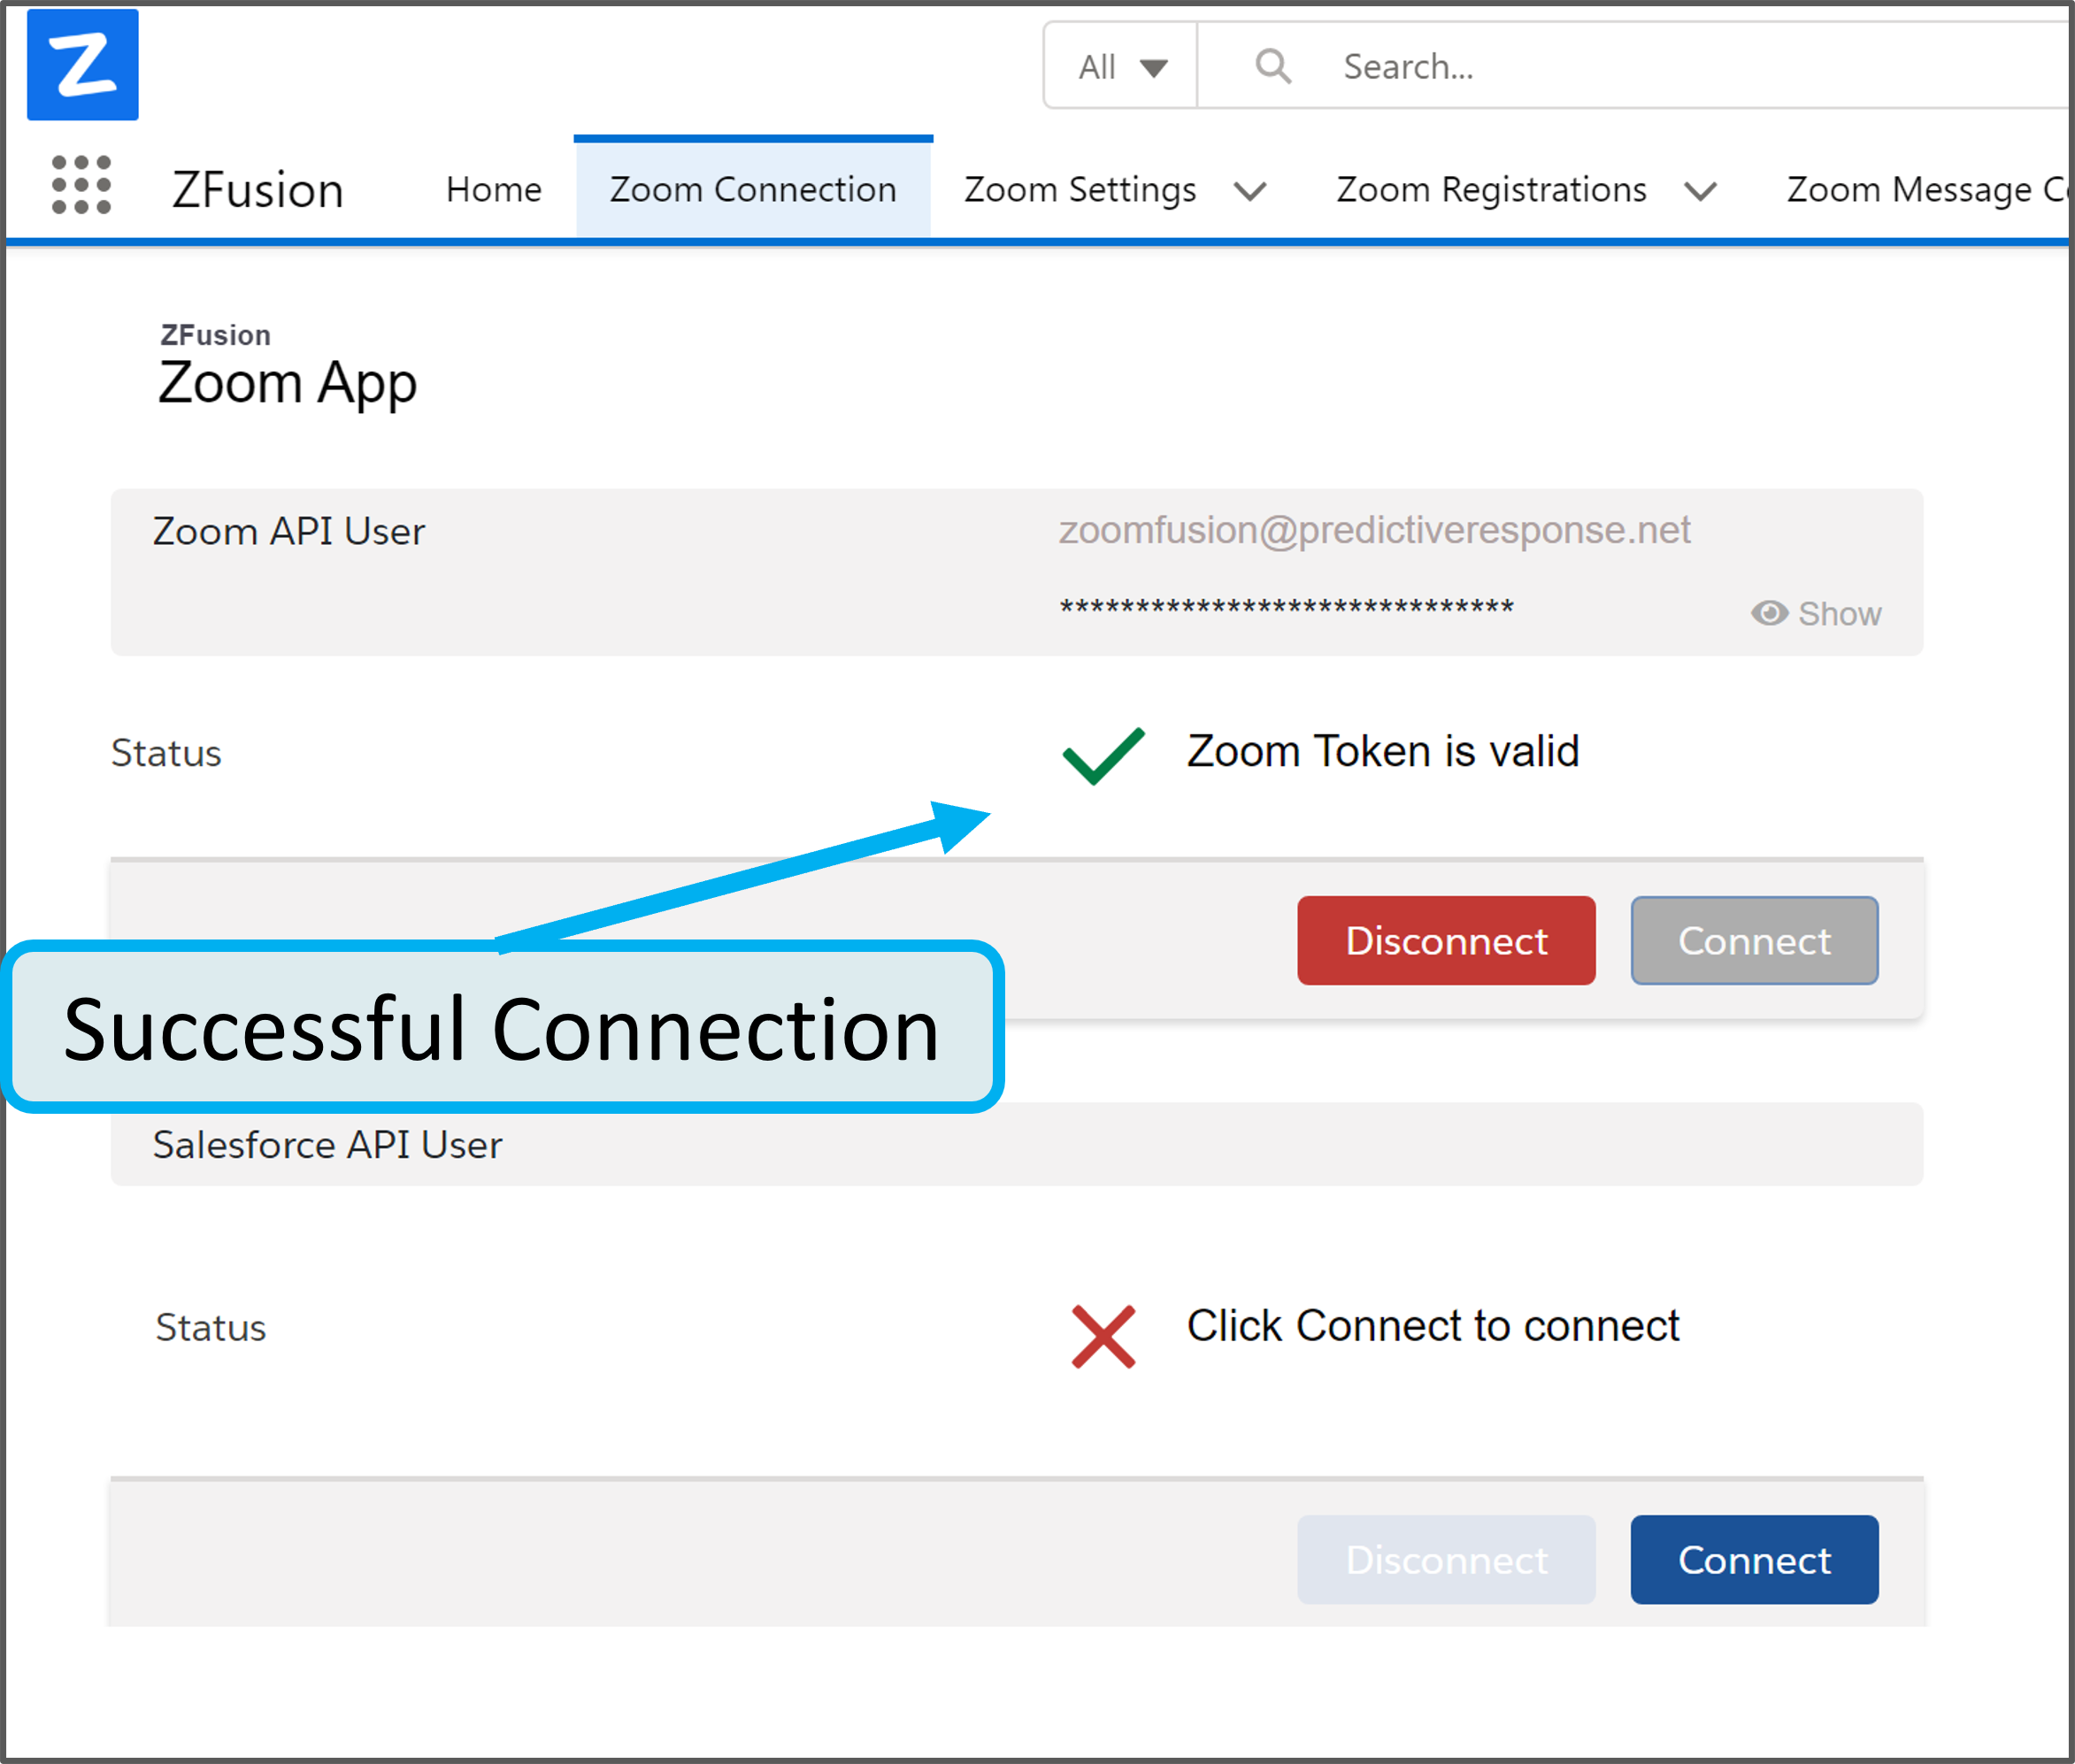
- You should now see a green checkmark, indicating that you have successfully connected your Zoom Account to Salesforce.
- Next, to complete the connection from Salesforce to Zoom, click the “Connect” button in the Salesforce API Section of the Zoom Connection Tab.
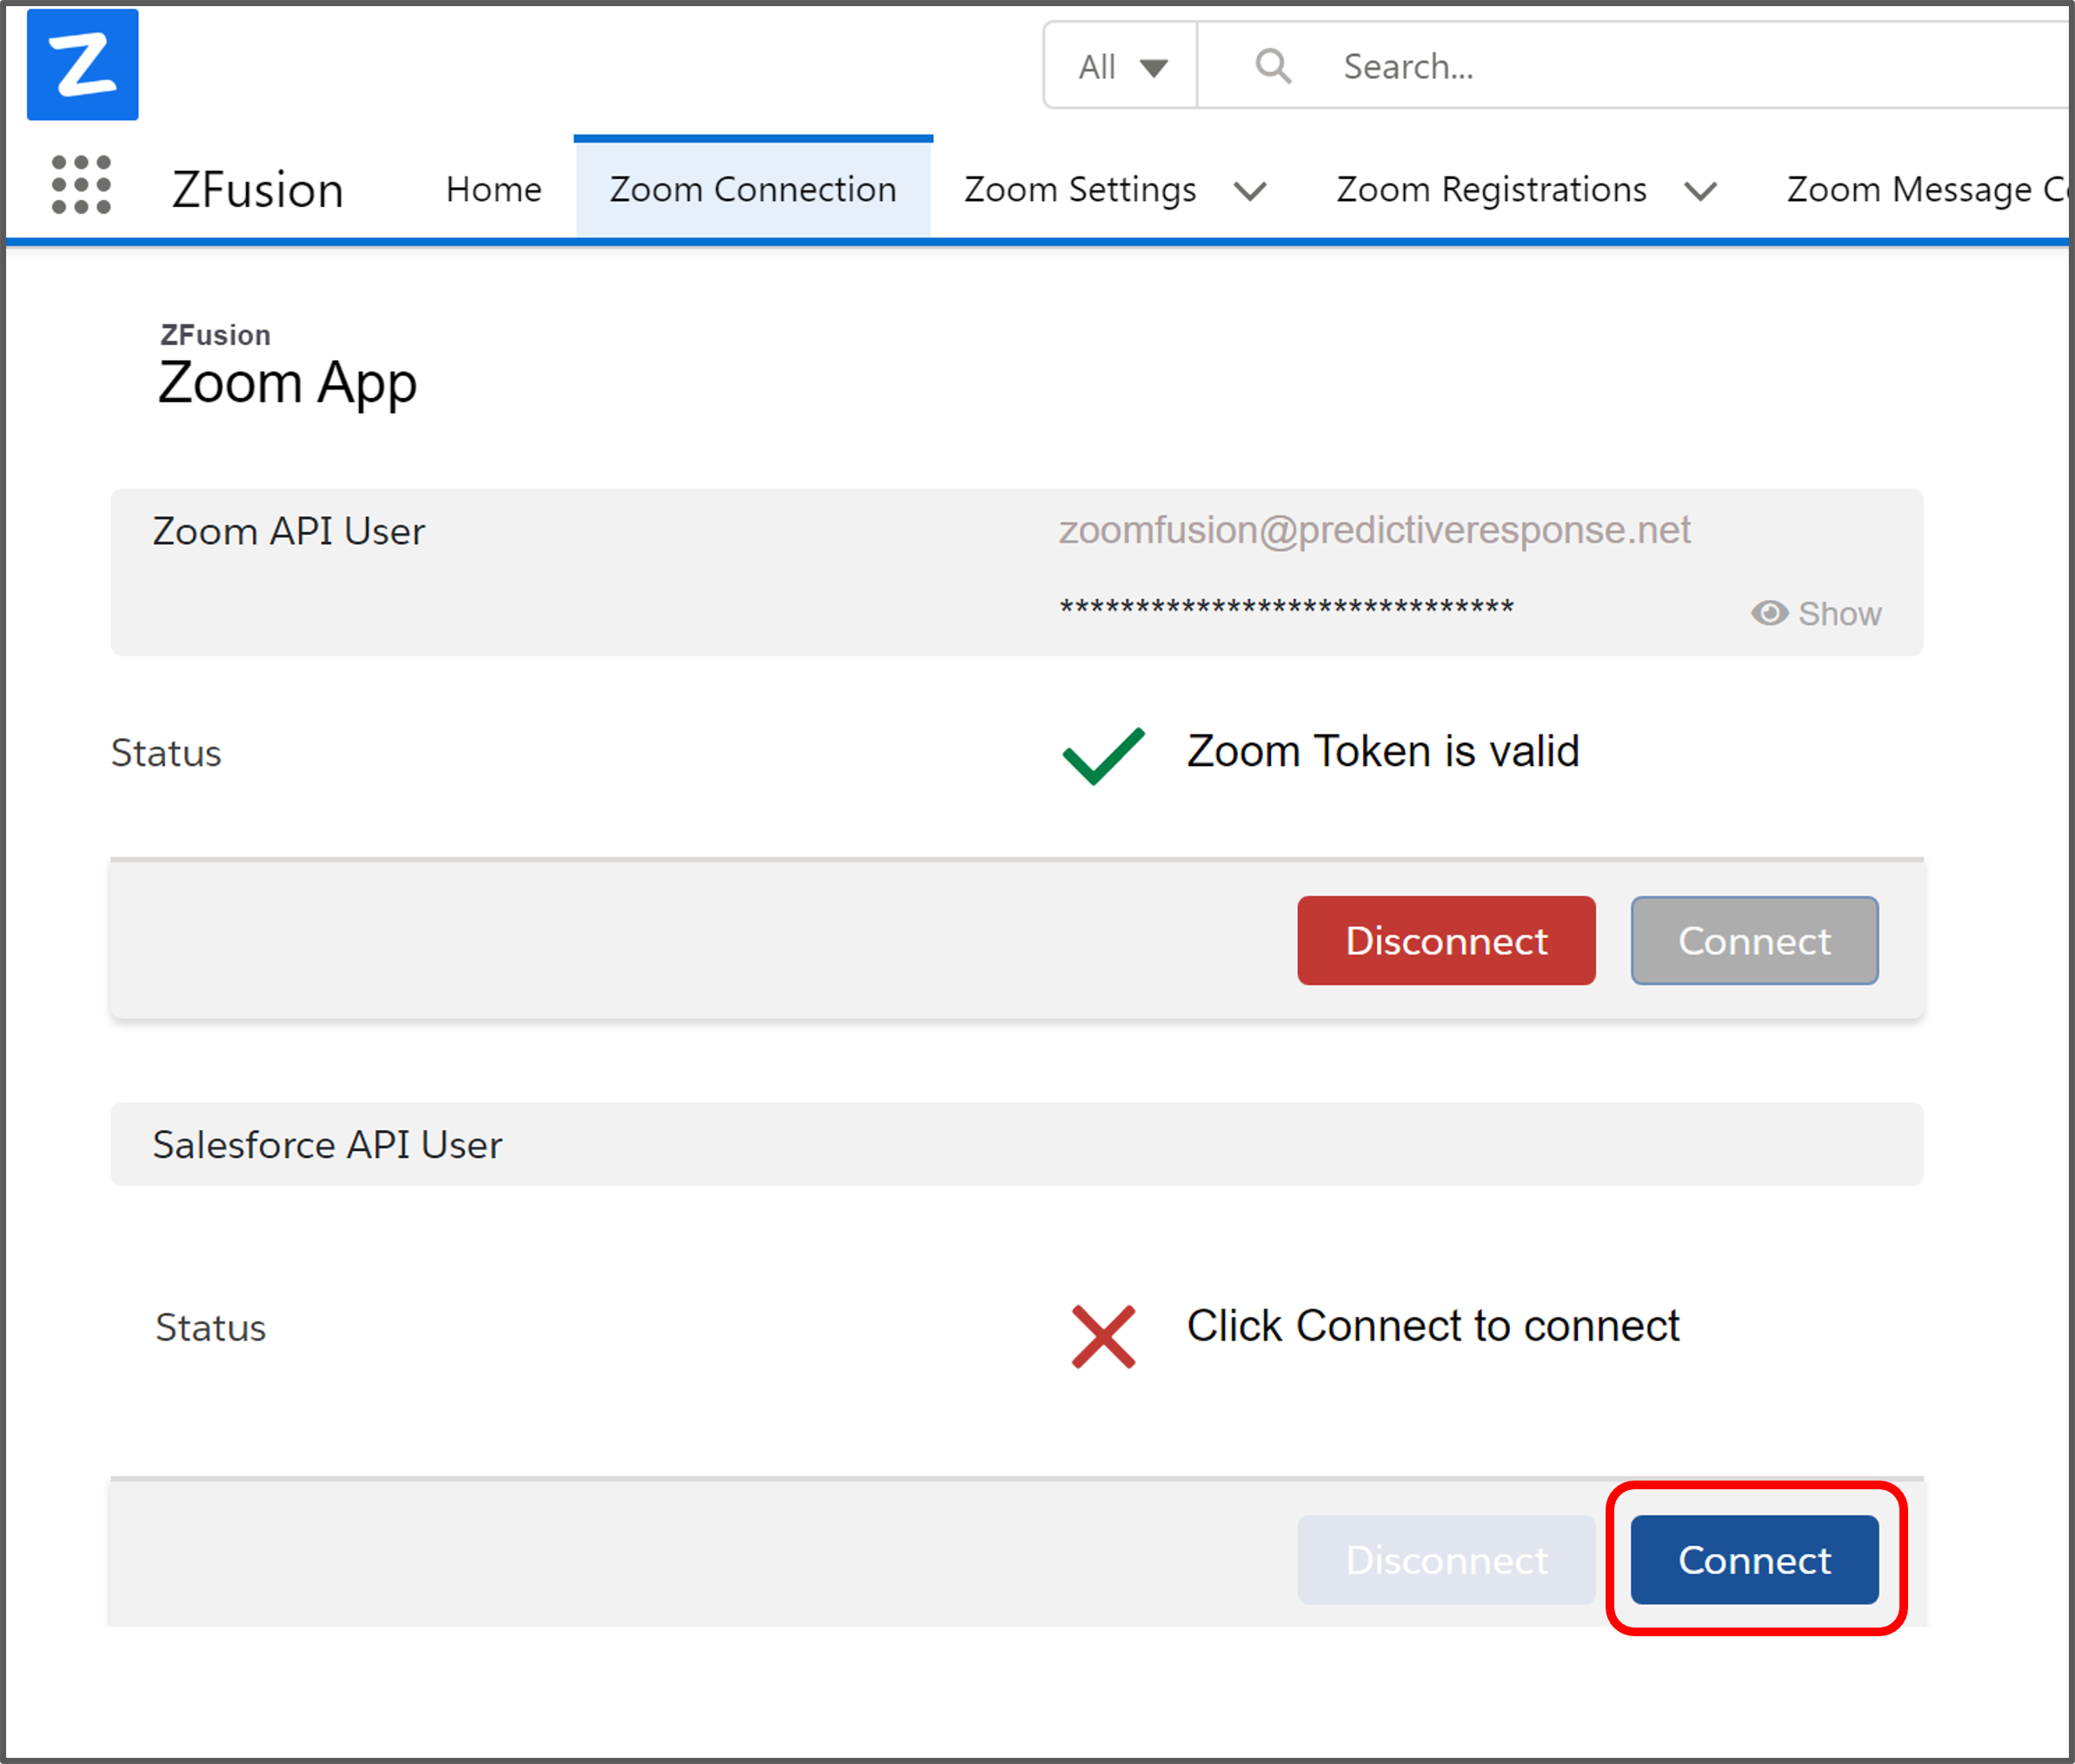
- You should now see a green checkmark, indicating that you have successfully connected your Salesforce account to Zoom.
There are several options for configuring the objects that ZFusion creates in your Salesforce. To customize your ZFusion setup, Navigate to the ZFusion Settings Tab and select the “Master” ZFusion Settings object.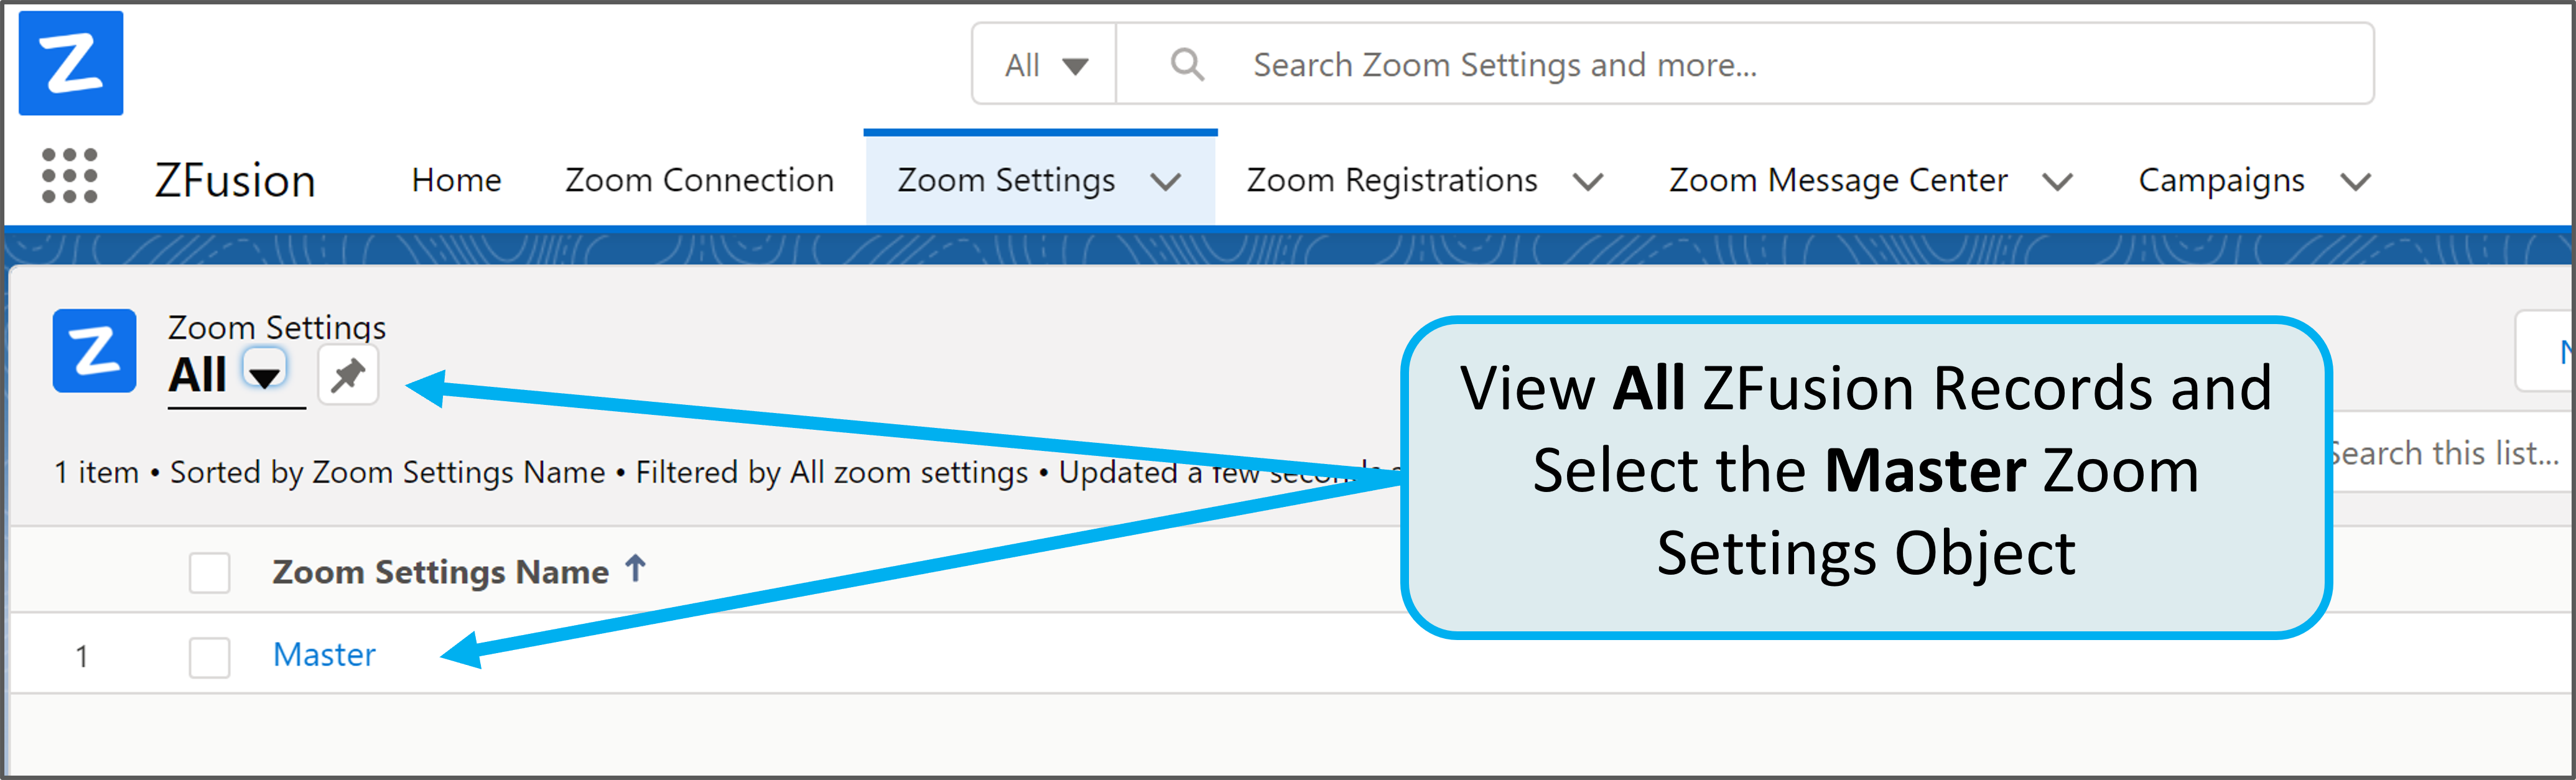
Step 4. Configuring ZFusion Settings
You can change data creation settings by editing fields on the Master ZFusion object.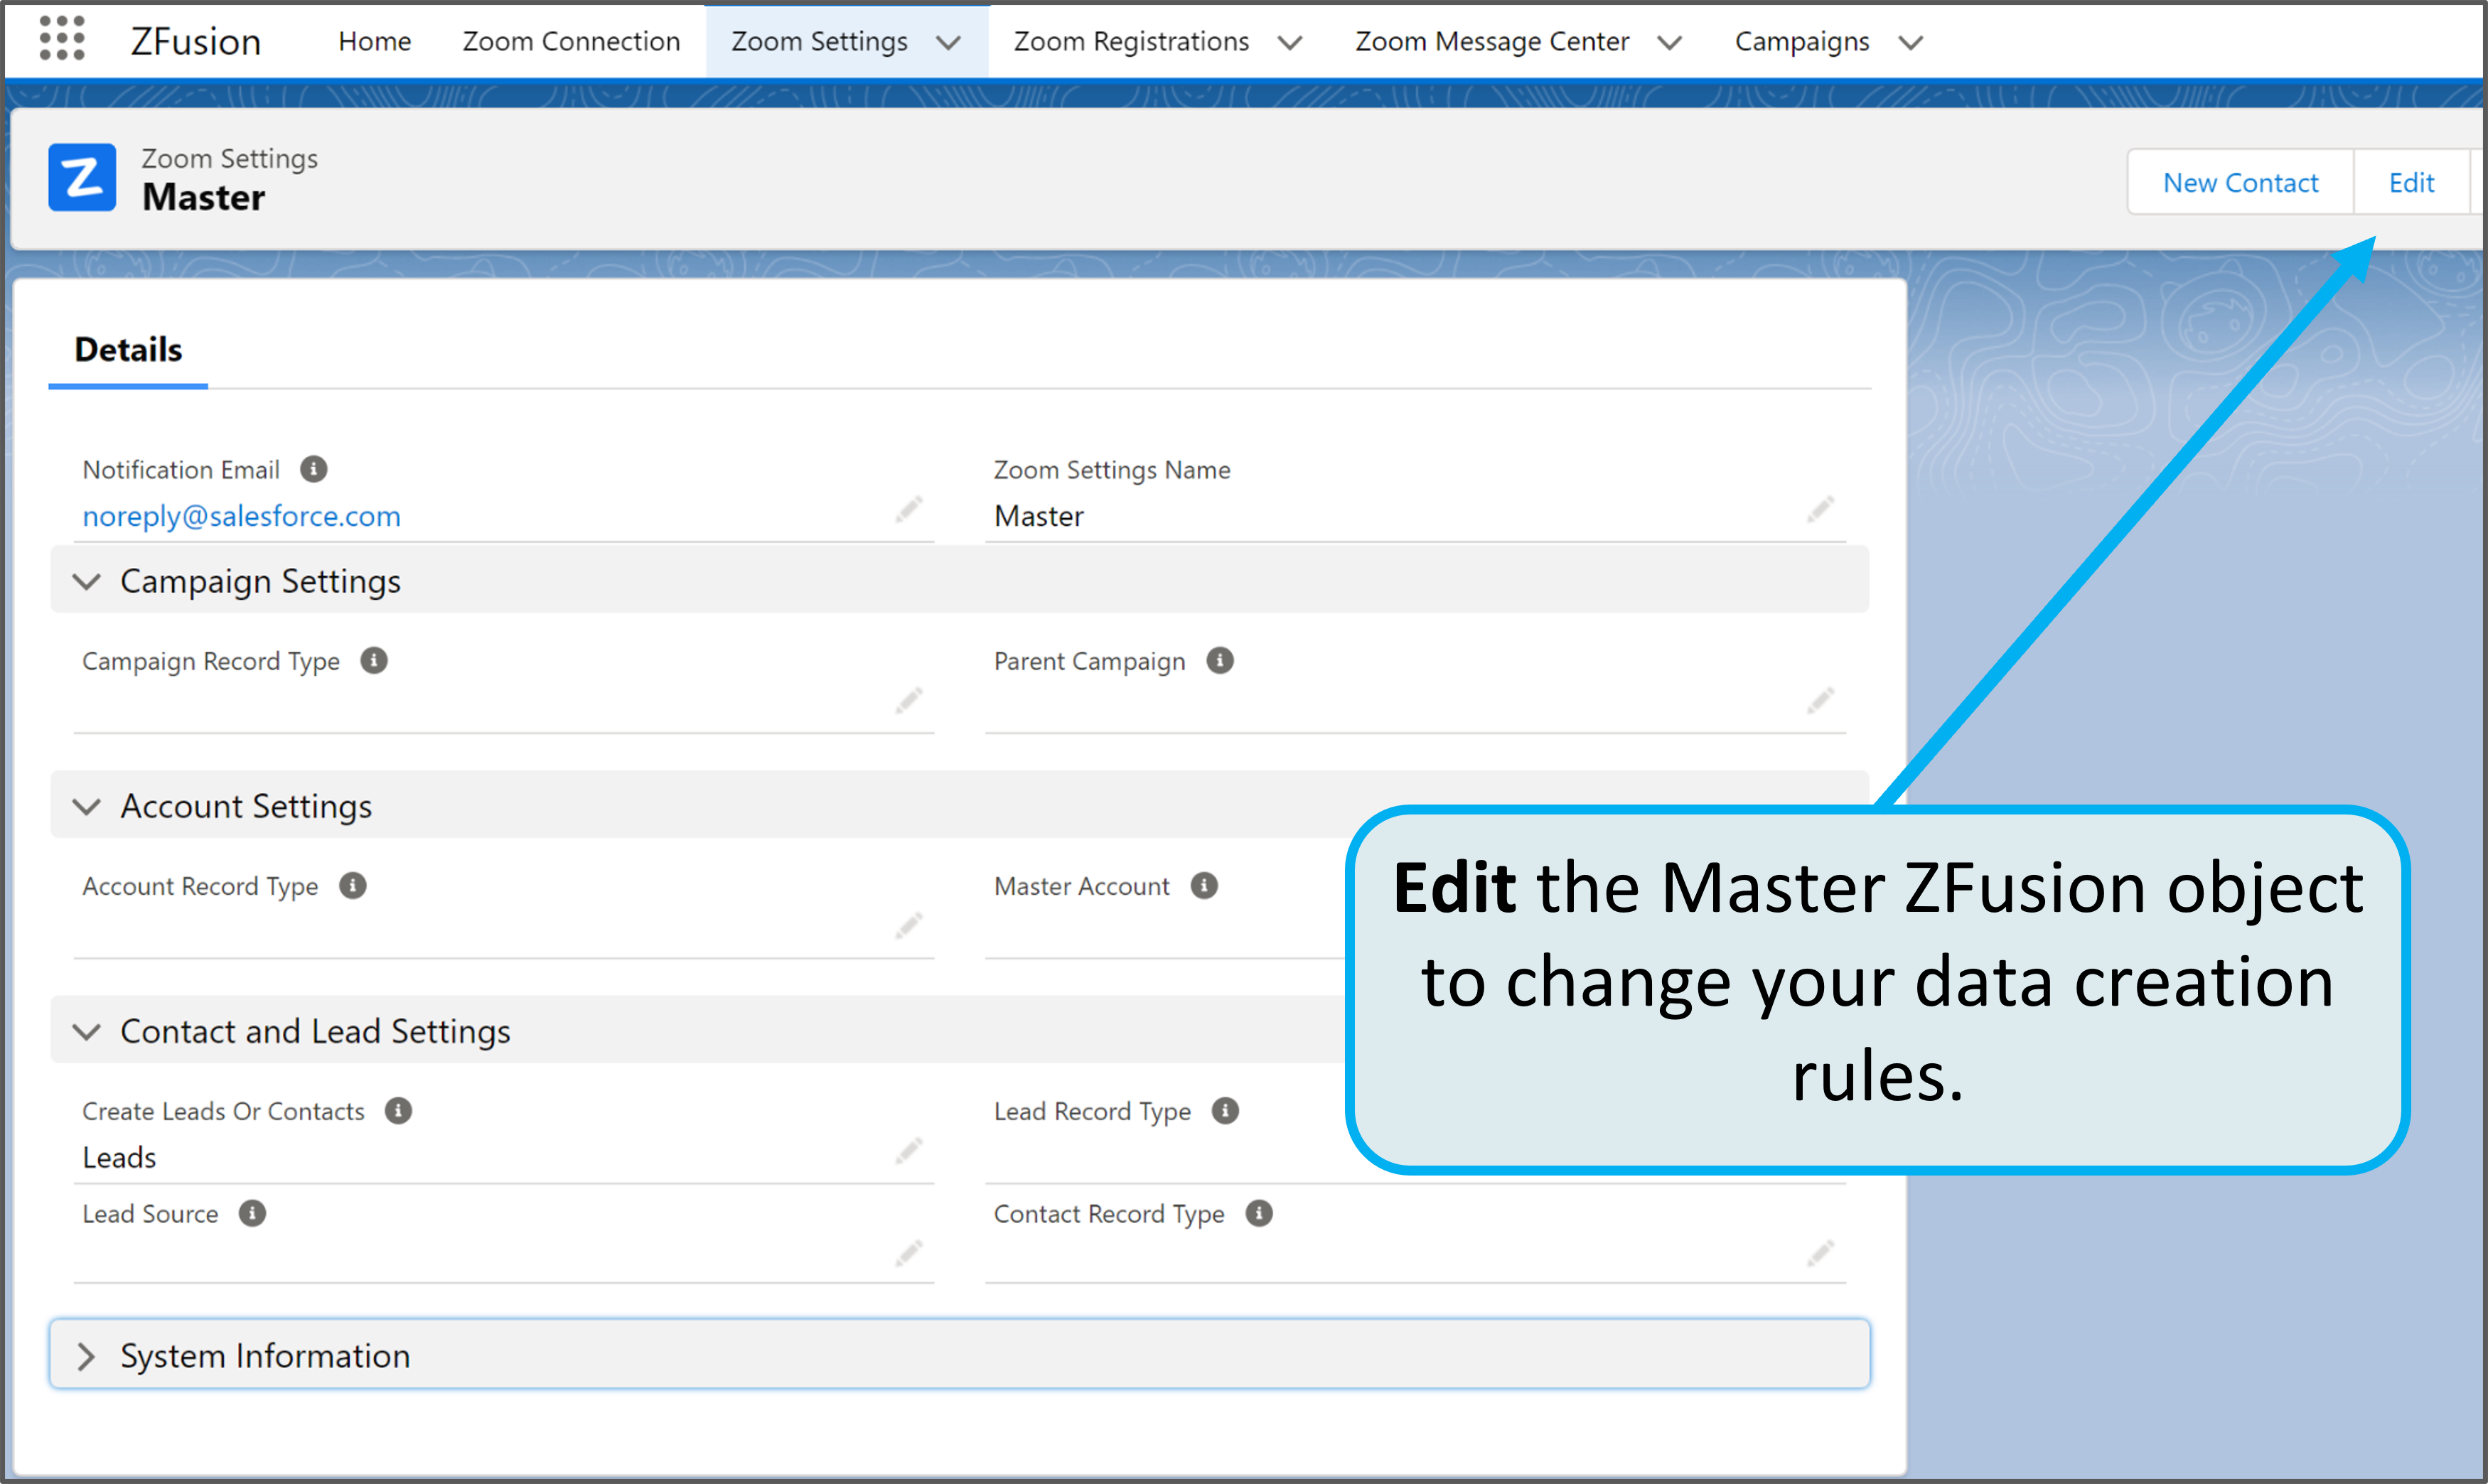
- Account Record Type: (Optional) To set the record type for accounts created by ZFusion, enter the 15 character Record Type ID* here (if left blank, default record type will be used)
- Campaign Record Type: (Optional) To set the record type for campaigns created by ZFusion, enter the 15 character Record Type ID* here (if left blank, default record type will be used)*
- Contact Record Type : (Optional) To set the record type for contacts created by ZFusion, enter the 15 character Record Type ID* here (if left blank, default record type will be used)
- Create Opportunities : Select the criteria for creating new opportunities from Zoom registrations. You can choose to:
- “-none-” Create no opportunities
- “For all registrations”: Create an opportunity for every new Zoom registration
- “For registrations >$0” Create an opportunity only for Zoom registrations with an associated cost
- Lead Source: (Optional) set a default lead source value for new leads or contacts created by ZFusion. Note that the value selected here must be an existing picklist value on your Lead Source field.
- Master Account Select an account that will be assigned to all new contacts created by EV Fusion (if left blank, a new account will be created for each contact by default). Note: Salesforce NPSP users should leave this field blank, as NPSP will automatically create a household account for each contact.
- Master Campaign: (Optional) Select a campaign to be assigned as parent for all campaigns created by ZFusion
- Opportunity Record Type: To set the record type for opportunities created by ZFusion, enter the 15 character Record Type ID* here (if left blank, default record type will be used)
- Opportunity Type: (Optional) set a default Type value for new opportunities created by ZFusion.
*To find the 15 character record type ID: Navigate to Salesforce setup/object manager/[object name]/record types

You are ready to begin using ZFusion once you’ve completed these steps.
If at any time you need help with your ZFusion setup, please visit our support resources to contact us.
Step 5. Configuring ZFusion Page Layouts
NEXT STEP: Using ZFusion
 (5)
(5) (0)
(0)